Using third party COM components in Windows Azure application
Include component in application
Steps:
1. Right click on folder to which the files should be added.
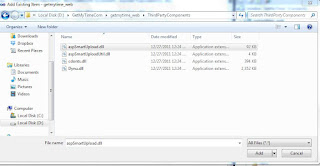
2. Select addàExisting ItemàPoint the dlls to be added.
3. Click ADD.
The files you selected can be seen in the folder to which you added the dlls.
4. Right click on the com components and select properties.
5. Set property value for “Copy to output directory” to “Copy if newer” or “Copy Always”
Create Command File
Steps:
1. Open new notepad
2. Save as “CommandFileName.cmd”
3. Include the following commands
· For register in gac utility
Eg: gacutil.exe /i SessionUtility.dll
· Expose the dllname.dll as a COM object using the regasm.exe
Eg: %SystemRoot%\microsoft.net\framework\v4.0.30319\regasm.exe
SessionUtility.dll /tlb:SessionUtility.tlb /s
· use regsvr32.exe to register it
Eg: %SystemRoot%\Syswow64\Regsvr32.exe SessionManager.dll /s
4. Include the command file in project.
5. Right click on the command file and select properties.
6. Set property value for “Copy to output directory” to “Copy if newer” or “Copy Always”
Configuration for startup task
Include configuration for startup task in “Servicedefenition.csdef” file as shown below:
Build and Deploy
Build and deploy the application and enjoy the power of COM components on Windows Azure environment as in any On-Premise server.


what s the use of it???
ReplyDeleteYou can use the com components in the Azure environment as you are doing it in the onpremise servers.
Delete